Table of Content
Discover How You Can Add a Font to Photoshop Quickly and Easily
Typography can make or break your design projects. With over 90% of design information processed visually, choosing the right font isn’t just about aesthetics—it’s about communication effectiveness. Whether you’re creating logos, banners, or complex visual designs, having access to the perfect font family can transform your Photoshop workflow from ordinary to extraordinary.
In this comprehensive guide, we’ll walk you through three different methods to add fonts to Photoshop, including the modern Adobe Fonts integration, traditional system installation, and mobile workflows. Plus, we’ll cover troubleshooting solutions for common font issues that can save you hours of frustration if you haven’t got a professional branding agency on hand for your project. Let’s begin.
Why Do You Need to Add Fonts to Photoshop in the First Place?
Photoshop is a complete tool that helps you to design any kind of logo or banner easily. However, sometimes you want to customize or add a few things to it to make your artwork more unique. It basically falls in the instincts of designers to use maximum customizations that suit well according to their working plans.
That is why many designers always want to use their own custom fonts while designing their preferred logos or banners. It is something that becomes necessary for them, as the creativity and uniqueness of banners are sometimes heavily dependent on the usage of these fonts.
And that’s not just the reason.
Many designers also prefer to use a unique set of fonts for the designing of official company logos. Their usage in these types of practices becomes very necessary. It gives them a strong typography to represent their brands and get more attention from the audience.
System Requirements: Prerequisites for How to Add Fonts to Photoshop
Before we begin to discuss how to add fonts to Photoshop and install them for use, we need to check some prerequisites to make sure that your system is capable of performing the methods below. Essentially, we need to ensure that you have:
- Adobe Photoshop 2021 or later (for optimal Adobe Fonts integration)
- Creative Cloud subscription (for Adobe Fonts access)
- Administrator privileges on your computer (for system-wide font installation)
- Stable internet connection (for Adobe Fonts sync)
Supported Font Formats:
- OpenType (.otf) – Recommended for professional work
- TrueType (.ttf) – Universal compatibility
- Variable fonts – Advanced typography control
Method 1: Adobe Fonts Integration (Recommended)
Adobe Fonts represents the modern approach to font management, offering over 20,000 licensed fonts that are synced across all your devices. This method is particularly valuable for professional designers who work across multiple devices or collaborate with teams.
Why Should You Choose Adobe Fonts?
One of the most prominent questions you might be asking right now would be – why Adobe Fonts? Well, considering that Photoshop is part of Adobe’s Creative Suite, choosing Adobe own font collections would be a given choice. Some primary benefits offered by Adobe’s collection of fonts include:
- Automatic synchronization across all devices
- Commercial licensing included with Creative Cloud
- No installation hassles or file management
- Seamless integration with all Adobe apps
- Regular updates with new font releases
A Step-by-Step Guide to Adobe Fonts Installation
Now that you know that Adobe Fonts are a great choice for Photoshop, lets take a look at some various methods about how to add fonts to Photoshop via Adobe. Let’s begin.
Option A: Direct from Photoshop
- Open Photoshop and ensure you’re signed into Creative Cloud
- Navigate to the Type menu → Select “More from Adobe Fonts”
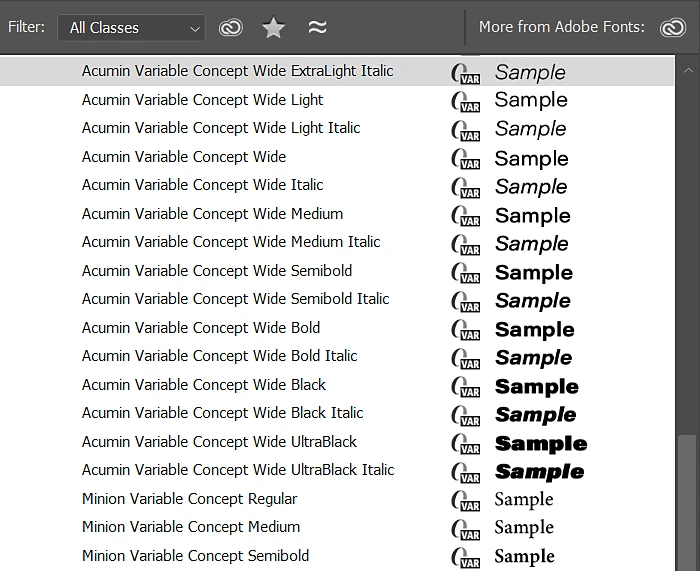
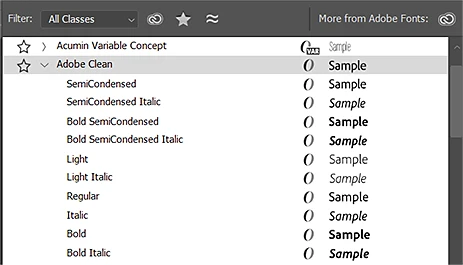
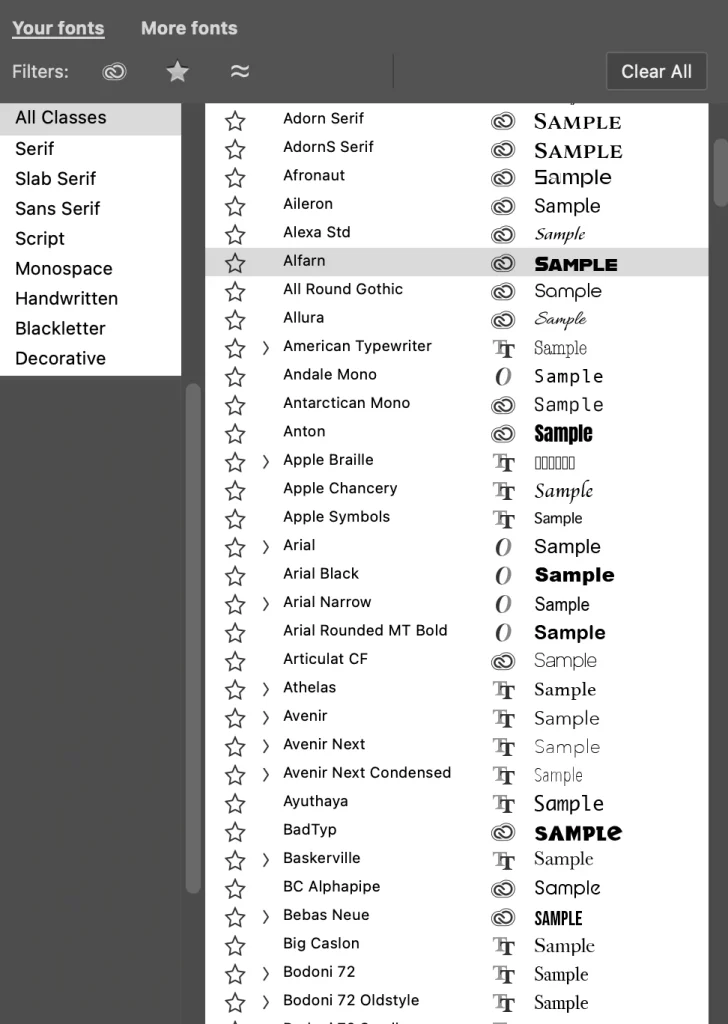
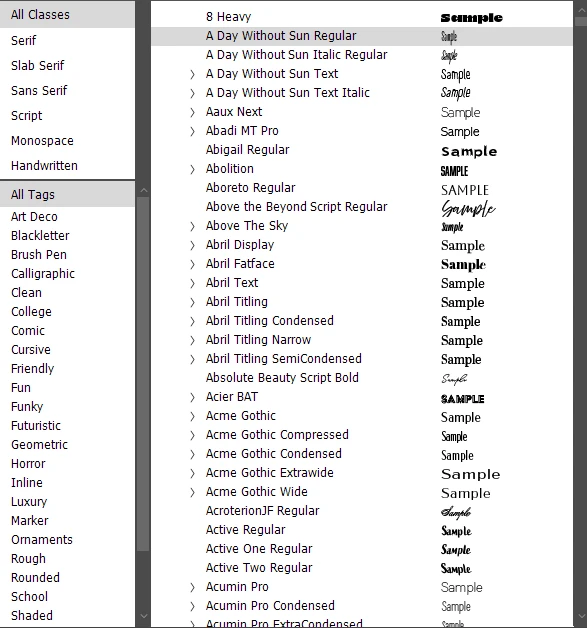
- Browse the Adobe Fonts library using filters like:
- Classification (Serif, Sans Serif, Script)
- Language support
- Visual characteristics
- Preview fonts by typing your own text in the preview box
- Click “Activate Font” to add it to your library
- Return to Photoshop – the font appears immediately in your font menu
Option B: Through Creative Cloud Desktop
- Open Creative Cloud Desktop app
- Click the “Fonts” icon in the top navigation
- Browse or search for your desired font family
- Click “View Family” to see all available weights and styles
- Toggle “Activate Font” for the styles you need
- Access in Photoshop through the Character panel font dropdown
Option C: Adobe Fonts Website
- Visit fonts.adobe.com in your browser
- Sign in with your Adobe ID
- Use advanced filtering to find specific font characteristics
- Test fonts with custom text samples
- Click “Activate Font” to sync to your devices
- Launch Photoshop to access your newly activated fonts
Managing Your Adobe Fonts
Now that you have decided to add some amazing Adobe Fonts to your typography repository, the question arises – how do you manage and sort them all into an easily accessible collection? Well, there are some simple and easy ways to manage your installed fonts. Let’s take a look.
Adding Fonts:
- Fonts activate instantly across all Adobe apps
- No restart required for Photoshop
- Unlimited activations with Creative Cloud subscription
Removing Fonts:
- Deactivate through Creative Cloud Desktop → Fonts → Manage
- Removes from all devices automatically
- Previously used fonts remain in “Previously Active” for easy reactivation
Performance Optimization:
- Keep active font list under 100 families for optimal performance
- Regularly review and deactivate unused fonts
- Use font favorites to quickly find frequently used typefaces
Method 2: Traditional Font Installation
Traditional font installation remains valuable for various types of fonts such as custom fonts, client-provided typefaces, or fonts not available through Adobe Fonts. This method installs fonts system-wide, making them available in all applications. And the best part is that you can install them no matter your PC’s platform, whether its Windows or macOS. Let’s take a look at the process.
How to Install Fonts in Photoshop on Windows 10/11
Microsoft Windows has become an obvious choice for many designers around the world. It is easy to use and offers fast performance for all the versions of Photoshop. Here is how to add fonts in Photoshop CS6 on Windows 10 in just a few minutes. It is quite easy and can be done in less than a minute.
Let’s take a look at how to add fonts in Photoshop with a step-by-step process.
Standard Installation Method
- Download your font files from a reputable source
- Locate the downloaded files (usually in Downloads folder)
- Extract if necessary – fonts often come in ZIP archives
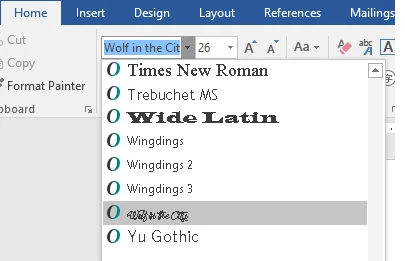
- Right-click the font file (.ttf or .otf)
- Select “Install” from the context menu
- Confirm installation in the preview window that appears
Alternative Windows Methods
If the standard Windows method doesn’t work for you for some reason, there are other ways to ensure that you are able to add fonts to Photoshop without issue. Let’s explore it further in detail.
Method 1: Drag and Drop
- Open Control Panel → Appearance and Personalization → Fonts
- Open file explorer with your font files
- Drag font files directly into the Fonts window
- Wait for installation confirmation
Method 2: Font Preview Installation
- Double-click the font file to open preview
- Review the font sample at different sizes
- Click “Install” button in the preview window
- Font installs system-wide automatically
Advanced: Command Line Installation
Now, what if you are an advanced user that can leverage the power of command line to accomplish your font installation instantly? Well, for such advanced users, you can install your desired font via PowerShell. Simply type in the following command on your PowerShell console.
Add-Font -Path “C:\Path\To\Font\FontName.ttf”
How to Add Fonts to Photoshop on macOS

Well, what if you are using a Mac from Apple instead of a PC using Microsoft Windows? In that case, here is how to add fonts in Photoshop in just a few minutes.
Standard Mac Installation
- Download and locate your font files
- Double-click the font file to open Font Book preview
- Review the font preview showing character sets
- Click “Install Font” button
- Font appears in Font Book and becomes available system-wide
Alternative Mac Methods
Just like with Windows, if the standard process doesn’t work for you to import fonts to Photoshop, here are some alternative methods to try.
Method 1: Font Book Direct
- Open Font Book application
- Choose File → Add Fonts
- Navigate to your font files
- Select and click “Open”
- Fonts install to your user library
Method 2: Manual Library Installation
- Copy font files to appropriate folder:
- User-specific: ~/Library/Fonts/
- System-wide: /Library/Fonts/
- Fonts activate automatically without restart needed
Method 3: Drag and Drop
- Open Font Book
- Drag font files directly into Font Book window
- Confirm installation when prompted
How to Add Fonts to Photoshop: Installation Best Practices for Windows and macOS
Installing or adding the desired fonts is just part of the process of adding new fonts to your repository. To manage and use them effectively, there are some best practices and standards that you need to follow to ensure success. Let’s take a look at them in detail.
File Organization:
- Create a dedicated “Fonts” folder for downloads
- Organize by project or font foundry
- Keep original ZIP files as backups
Validation Before Installation:
- Preview fonts before installing
- Check for font corruption
- Verify licensing for intended use
System Performance:
- Install only fonts you actively use
- Remove unused fonts periodically
- Monitor system performance with large font libraries
Method 3: Mobile and iPad Installation

With Photoshop now available on iPad and other mobile devices, font installation extends beyond desktop computers. Here’s how to add fonts to Photoshop on mobile platforms, including the iPad.
iPad Font Installation
There are two ways to add a font to Photoshop as per your need. Let’s explore them in detail.
Using Creative Cloud Mobile App
- Download Creative Cloud app from the App Store
- Sign in with your Adobe ID
- Navigate to “Fonts” in the bottom navigation
- Browse available fonts from Adobe Fonts library
- Tap “Install Font” for desired typefaces
- Access in Photoshop iPad through font picker
Configuration Profile Method
For custom fonts not available in Adobe Fonts, you can:
- Use AnyFont app or similar font installer
- Import font files to your iPad
- Generate configuration profile through the app
- Install profile when prompted by iOS
- Fonts become available in all compatible apps
iPhone Photoshop Express
For iPhone, you need to use another method different from the iPad if you want to know how to add fonts to Photoshop. The process entails the following:
- Open Photoshop Express
- Access text tool in editing interface
- Available fonts are limited to iOS system fonts and Adobe Fonts
- Adobe Fonts appear if logged into Creative Cloud
Add Font to Photoshop: Mobile Limitations and Workarounds
Unlike the PC environment, adding your desired fonts to Photoshop via mobile devices do have their set of limitations, as well as workarounds to mitigate the impact of those limitations. Let’s explore these in detail as well.
Limitations:
- iOS restricts custom font installation
- Not all font formats supported
- Limited to system fonts + Adobe Fonts in most cases
Workarounds:
- Use Adobe Fonts exclusively for cross-device projects
- Create text elements on desktop, then import to mobile
- Utilize iPad-specific font installer apps for custom typefaces
Understanding Font Formats: TTF vs OTF
Choosing the right font format affects compatibility, features, and performance in Photoshop. Here’s what you need to know about the two primary font file formats.
TrueType Fonts (.ttf)
Advantages:
- Universal compatibility across all operating systems
- Smaller file sizes for basic character sets
- Faster rendering in some applications
- Wide software support including older programs
Disadvantages:
- Limited advanced features compared to OpenType
- Basic character set without extensive alternates
- Less flexible for complex typography
Best for:
- Basic text applications
- Web fonts
- Maximum compatibility requirements
- Older software compatibility
OpenType Fonts (.otf)
Advantages:
- Advanced typographic features (ligatures, alternates, small caps)
- Extensive character sets including multiple languages
- Better design flexibility with contextual alternates
- Professional typography capabilities
Disadvantages:
- Larger file sizes due to feature complexity
- Potential compatibility issues with very old software
- May require OpenType-aware applications for full features
Best for:
- Professional design work
- Multilingual projects
- Advanced typography requirements
- Creative projects requiring font variations
What are Variable Fonts: The Future of Typography
- Single font file containing multiple variations
- Adjustable weight, width, and optical size
- Smooth transitions between font styles
- Smaller file sizes than multiple separate fonts
Photoshop Support:
- Full variable font support in Photoshop 2021+
- Access through Character panel sliders
- Real-time adjustment of font properties
- Export compatibility maintained
How to Add Fonts to Photoshop: Font Management Best Practices
Proper font management ensures optimal Photoshop performance and prevents common issues that can disrupt your workflow. Here’s how you can accomplish it effectively.
Organizational Strategies – Different Font Library Structures
By Project Type:
Fonts/
├── Branding-Projects/
├── Web-Design/
├── Print-Materials/
├── Social-Media/
└── Client-Specific/
By Font Classification:
Fonts/
├── Serif/
├── Sans-Serif/
├── Script/
├── Display/
└── Monospace/
Font Naming Conventions
- Use consistent naming for font families
- Include weight and style in filename
- Add version numbers for font updates
- Document font licensing status
Performance Optimization – Improving Font Loading Speed
Limit Active Fonts:
- Keep under 200 active fonts for optimal performance
- Deactivate unused font families regularly
- Use font management software for large collections
System Resources:
- Monitor RAM usage with large font libraries
- Clear font caches periodically
- Restart Photoshop after major font changes
Memory Management via Font Cache Optimization:
- Clear system font caches monthly
- Reset Photoshop font cache when experiencing issues
- Monitor for corrupted font files
Team Collaboration – Accessing Shared Font Libraries
Creative Cloud Team Plans:
- Use Adobe Fonts for team consistency
- Share custom fonts through Creative Cloud Libraries
- Establish team font standards and guidelines
Custom Font Sharing:
- Document font licensing for team use
- Use font management servers for enterprise
- Create font packages for project handoffs
Project Documentation – Style Guide Font Specifications:
Keeping effective documentation about the used fonts in your project is a great way to ensure homogeneity in your documents.
- Document all fonts used in projects
- Include licensing information
- Specify font versions and sources
- Create font usage guidelines
How to Add Fonts to Photoshop: Troubleshooting Common Issues
Font-related problems can significantly impact your design workflow. Here are solutions to the most common issues and problems that you’ll encounter when installing and using external fonts.
Fonts Not Appearing in Photoshop
If your installed fonts are not appearing in your Photoshop instance, there are a few ways to check and ensure that the fonts are usable. Let’s explore a few of these methods.
Immediate Solutions
Step 1: Restart Photoshop
- Close Photoshop completely
- Reopen the application
- Check font menu for newly installed fonts
Step 2: Refresh Font List
- In Photoshop, go to Type → Match Font
- This forces Photoshop to refresh its font database
- Cancel the Match Font dialog after refresh
Step 3: Reset Photoshop Preferences
- Hold Ctrl+Alt+Shift (Windows) or Cmd+Option+Shift (Mac) while starting Photoshop
- Confirm preference reset when prompted
- Note: This resets all Photoshop preferences
Advanced Solutions
Clear Font Cache (Windows):
# Open Command Prompt as Administrator
net stop FontCache
del /f /s /q %windir%\System32\FNTCACHE.DAT
net start FontCache
Clear Font Cache (Mac):
# Open Terminal and run:
sudo atsutil databases -remove
sudo atsutil server -shutdown
sudo atsutil server –ping
Manual Font Cache Reset:
- Navigate to font cache folder:
- Windows: C:\Windows\System32\FNTCACHE.DAT
- Mac: ~/Library/Caches/com.apple.ATS/
- Delete cache files
- Restart your computer
- Launch Photoshop
Adobe Fonts Not Syncing
Now, if your added Adobe Fonts are not syncing across devices, there is no need to be worried. There are a few tried and tested ways to accomplish that. Let’s take a look at them.
Sync Troubleshooting Steps
Step 1: Check Creative Cloud Status
- Ensure Creative Cloud Desktop is running
- Verify you’re signed in with correct Adobe ID
- Check internet connection stability
Step 2: Force Font Sync
- Open Creative Cloud Desktop
- Click profile icon → Preferences
- Navigate to Fonts section
- Click “Sync Fonts Now”
Step 3: Reset Adobe Fonts
- Sign out of Creative Cloud completely
- Clear Adobe Fonts cache
- Sign back in and reactivate fonts
Network and Firewall Issues
Corporate Networks:
- Check if Adobe Fonts domains are blocked
- Required domains: fonts.adobe.com, typekit.net
- Contact IT for firewall configuration
Proxy Settings:
- Configure Creative Cloud for proxy if needed
- Test direct connection if possible
- Use mobile hotspot to test connectivity
Corrupted Font Detection
If your installed fonts are showing up as corrupted, here are some great ways to ensure that the corrupted fonts are identified and fixed easily.
Identifying Corrupted Fonts
Symptoms:
- Photoshop crashes when selecting certain fonts
- Text displays incorrectly or as boxes
- Font preview shows garbled characters
- Application becomes unresponsive
Detection Methods:
- Font Book Validation (Mac):
- Open Font Book
- Select File → Validate Fonts
- Review validation report for errors
- Manual Testing:
- Create test document with suspected font
- Type sample text
- Look for rendering issues
Removing Corrupted Fonts
Safe Removal Process:
- Identify problematic font through testing
- Backup font file before removal
- Remove from system fonts folder
- Clear font caches
- Restart applications
Missing Fonts in Shared Documents
If you add a font to Photoshop but it shows up as missing in shared documents, here is how you can fix it.
When Opening Files with Missing Fonts
Photoshop’s Built-in Solutions:
- Choose “Find Similar” for automatic substitution
- Select “Replace Missing Fonts” for manual selection
- Use “Continue” to keep missing font references
Professional Workflow:
- Document all fonts used in projects
- Package fonts with project files
- Use Adobe Fonts for team consistency
- Create font substitution guidelines
Font Replacement Strategies
Automatic Replacement:
File → Scripts → Font Replacement
- Lists all missing fonts
- Suggests similar available fonts
- Batch replace across document
Manual Replacement:
- Use Character panel to identify missing fonts
- Select similar fonts from your library
- Update style guides with replacements
Performance Issues with Large Font Libraries
Often, font libraries of large sizes can cause performance issues on systems with lower specifications. If you too are facing such issues, here is how you can improve them.
Optimization Techniques
Font Loading Optimization:
- Limit active fonts to current project needs
- Use font management software
- Organize fonts into project-specific sets
System Performance:
- Monitor RAM usage during font-heavy work
- Close unnecessary applications
- Increase virtual memory if needed
Application Settings:
- Disable font previews if not needed
- Reduce font preview size in preferences
- Use font filtering to narrow choices
Add a Font to Photoshop: Advanced Font Techniques
For advanced users, there is more to Photoshop typography than just adding and using new fonts. Master the following advanced techniques to streamline your font workflow and create more sophisticated typography in Photoshop.
Font Preview and Testing Strategies
For testing out different fonts side by side, here are some great techniques to add to your practices.
Effective Font Comparison
Side-by-Side Testing:
- Create multiple text layers with different fonts
- Use same text content for accurate comparison
- Test at various sizes (12pt, 18pt, 36pt, 72pt)
- Compare readability and visual impact
Context Testing:
- Preview fonts within actual design layouts
- Test color combinations and backgrounds
- Evaluate font performance in intended use case
- Consider viewing distance and medium
Font Pairing Techniques
Complementary Pairing Rules:
- Combine serif with sans-serif for contrast
- Match x-heights for visual harmony
- Limit to 2-3 font families per project
- Test weight and style variations
Advanced Pairing Tools:
- Use Adobe Fonts pairing suggestions
- Leverage font classification filters
- Test historical period compatibility
- Consider cultural and contextual appropriateness
Batch Font Management
Installing and managing a larger set of fonts individually can be a huge hassle. Here is how you can process these operations in batch easily.
Installing Multiple Fonts Efficiently
Windows Batch Installation:
- Select multiple font files in Explorer
- Right-click and choose “Install”
- Windows installs all selected fonts simultaneously
- Monitor installation progress
Mac Batch Installation:
- Select multiple font files in Finder
- Drag selection to Font Book
- Confirm batch installation
- Fonts install to user library
Font Organization Systems
Project-Based Organization:
- Create font collections for specific projects
- Use font management software tags
- Document font usage across projects
- Maintain project font archives
Style-Based Collections:
Collections/
├── Headlines/
├── Body-Text/
├── Display/
├── Specialty/
└── Brand-Fonts/
Cross-Device Font Synchronization
Ensuring that your chosen font appears the same across different devices is a given these days, as people move seamlessly from PC to mobile devices and vice versa. Here is how you can sync your fonts across devices.
Adobe Creative Cloud Sync
Optimal Sync Setup:
- Ensure all devices use same Adobe ID
- Enable font sync in Creative Cloud preferences
- Regularly check sync status across devices
- Resolve conflicts promptly
Sync Troubleshooting:
- Check internet connectivity on all devices
- Verify Creative Cloud app is running
- Manually trigger sync refresh
- Contact Adobe support for persistent issues
Alternative Sync Solutions
Cloud Storage Methods:
- Store font libraries in Dropbox/Google Drive
- Create symbolic links to cloud folders
- Maintain consistent folder structures
- Document licensing for shared fonts
Enterprise Font Management:
- Use dedicated font servers
- Implement font licensing compliance
- Create automated font deployment
- Monitor font usage across teams
Professional Typography Workflows
One of the core aspects of knowing how to add fonts to Photoshop is choosing the right fonts to install. Here are some innovative typography workflows you can use for this.
Font Selection Process
Design Brief Analysis:
- Identify project requirements and constraints
- Determine target audience and context
- Research competitor typography choices
- Create mood boards with font options
Client Presentation:
- Create font specimen sheets
- Show fonts in context of actual content
- Provide rationale for font choices
- Include licensing and technical specifications
Version Control for Fonts
Font Versioning:
- Track font version numbers
- Document font updates and changes
- Maintain backwards compatibility
- Archive previous font versions
Project Documentation:
Project: Logo Redesign 2025
Fonts Used:
– Primary: Helvetica Neue (v2.1) – Adobe Fonts
– Secondary: Georgia Pro (v1.8) – System Font
– Accent: Custom Brand Font (v3.2) – Licensed
Last Updated: June 2025
Best Font Resources
You can expand your font library with these carefully curated font sources, each repository offering unique advantages for different design needs. Let’s take a look at them in detail.
Free Commercial-Use Fonts
For some great free font options, here are some great online repositories, including the likes of Google Fonts.
Google Fonts
Website: fonts.google.com Best for: Web-safe fonts, extensive language support
Google Fonts Highlights:
- 1,400+ font families completely free
- Excellent web font optimization
- Variable font options available
- APIs for web integration
- Download for desktop use
Popular Choices:
- Roboto – Modern, friendly sans-serif
- Open Sans – Highly readable, versatile
- Lato – Elegant, professional appearance
- Montserrat – Inspired by Buenos Aires signage
Adobe Fonts (Creative Cloud)
Access: Included with Creative Cloud subscription Best for: Professional typography, commercial projects
Adobe Fonts Highlights:
- 20,000+ fonts from leading foundries
- Automatic licensing for commercial use
- Seamless Creative Cloud integration
- Regular updates with new releases
- Desktop and web font access
Curated Collections:
- Award-winning typefaces
- Trending fonts
- Historical recreations
- Multilingual support
DaFont.com
Website: dafont.com Best for: Creative, decorative fonts
DaFont Highlights:
- Largest free font collection online
- Creative and display fonts
- Easy browsing by category
- User-contributed content
- Regular new additions
Categories:
- Fancy fonts for special projects
- Bitmap fonts for retro designs
- Foreign language fonts
- Holiday and seasonal themes
Premium Font Sources
If you are looking for some great premium font options, here are some great sources.
Monotype Fonts
Website: fonts.com Best for: Enterprise and brand fonts
Monotype Fonts Highlights:
- Industry-leading font foundry
- Comprehensive font families
- Enterprise licensing options
- Custom font creation services
- Historical and modern typefaces
MyFonts
Website: myfonts.com Best for: Independent foundries, unique typefaces
MyFonts Highlights:
- Extensive marketplace of independent designers
- Font identification tools
- Flexible licensing options
- Regular sales and promotions
- Detailed font information and specimens
Fontspring
Website: fontspring.com Best for: Worry-free licensing
Fontspring Highlights:
- Clear, simple licensing terms
- No ongoing fees or subscriptions
- Curated collection of quality fonts
- Font pairing suggestions
- Excellent customer support
Specialized Font Categories
For some special fonts, you can look for options among the following font categories.
Script and Handwriting Fonts
Creative Market
- High-quality script fonts
- Hand-lettered styles
- Wedding and invitation fonts
- Brush and marker styles
Font Bundles
- Curated script collections
- Seasonal font packages
- Matching font families
- Commercial licensing included
Technical and Code Fonts
GitHub Font Collections
- Open-source programming fonts
- Monospace families
- Code editor optimized
- Developer community maintained
Recommended Monospaced Fonts:
- Fira Code – Programming ligatures
- JetBrains Mono – Developer focused
- Source Code Pro – Adobe’s coding font
- Inconsolata – Google Fonts monospace
Font Pairing Resources
To find the best pairings for your chosen fonts, you can use the following resources.
Font Pairing Tools
FontPair
- Google Fonts pairing suggestions
- Visual examples and previews
- Copy-ready CSS code
- Curated combinations
Adobe Color
- Color and typography coordination
- Adobe Fonts integration
- Professional design inspiration
- Community sharing
Typography Learning Resources
Books:
- “Thinking with Type” by Ellen Lupton
- “The Elements of Typographic Style” by Robert Bringhurst
- “Typography for Lawyers” by Matthew Butterick
Online Courses:
- Typography courses on Skillshare
- Adobe certification programs
- Design school typography modules
Licensing Considerations
Font licenses are an important consideration when choosing your typography. Here are some elements you need to know to find the font with your desired license of usage.
Understanding Font Licenses
Desktop License:
- Install on specified number of computers
- Use in desktop applications
- Print and PDF creation allowed
- Commercial use varies by license
Web Font License:
- Use fonts on websites
- Specify page view limits
- May require separate purchase
- Consider loading performance
Extended Licenses:
- Logo and trademark use
- Broadcast and film use
- Merchandise and product packaging
- Higher user limits
License Compliance
Best Practices:
- Read license terms carefully
- Document license details for projects
- Keep proof of purchase/license
- Respect usage limitations
- Consider team and client needs
Red Flags:
- “Free” fonts with unclear licensing
- Fonts from questionable sources
- Modified or renamed commercial fonts
- Fonts without clear attribution
Frequently Asked Questions (FAQs)
| How many fonts can I install in Photoshop? While there’s no hard limit, we recommend keeping under 200 active fonts for optimal performance. Photoshop loads all system fonts, so large libraries can slow startup and font menu browsing. |
| Do I need to restart Photoshop after installing fonts? Usually not. Photoshop typically recognizes new fonts immediately. If fonts don’t appear, try refreshing the font list (Type → Match Font, then cancel) or restart the application. |
| What’s the difference between installing fonts for “current user” vs “all users”? Current user installation makes fonts available only to your user account, while all users installation makes them system-wide. Administrator privileges are required for all users installation. |
| Why aren’t my Adobe Fonts appearing in Photoshop? Ensure you’re signed into Creative Cloud, have an active subscription, and Creative Cloud Desktop is running. Try signing out and back in, or manually sync fonts through Creative Cloud preferences. |
| Can I use Adobe Fonts for commercial projects? Yes, Adobe Fonts includes commercial licensing for all subscribers. You can use them in client work, logos, and commercial projects without additional fees. |
| What happens to Adobe Fonts if I cancel my Creative Cloud subscription? Adobe Fonts will no longer sync or be available in applications. Documents using these fonts may show “missing font” warnings. Download alternatives before canceling if needed. |
| Why do my fonts look blurry or pixelated in Photoshop? This often indicates a corrupted font file or incompatible font format. Try reinstalling the font, clearing font caches, or using a different font format (OTF instead of TTF). |
| My font menu is loading very slowly in Photoshop. What can I do? Reduce your active font library, disable font previews (Preferences → Type → Font Preview Size → None), and clear font caches. Consider using font management software to organize fonts. |
| Should I use TTF or OTF fonts for Photoshop? OTF (OpenType) fonts are generally preferred for professional work as they support advanced typography features, extensive character sets, and better multilingual support. TTF fonts work well for basic applications. |
| Can I use web fonts in Photoshop? Web fonts (WOFF/WOFF2) are not directly supported in Photoshop. You’ll need the desktop version (TTF/OTF) of the same font family for Photoshop use. |
| Do variable fonts work in Photoshop? Yes, Photoshop 2021 and later support variable fonts with adjustable properties like weight, width, and optical size through the Character panel. |
| How do I use the same fonts on both desktop and iPad Photoshop? Use Adobe Fonts for automatic synchronization across devices, or install fonts through iOS configuration profiles for custom fonts. Creative Cloud ensures font consistency across platforms. |
| Can I install custom fonts on iPad for Photoshop? Custom fonts can be installed through iOS configuration profiles or apps like AnyFont. However, Adobe Fonts provides the most seamless experience for iPad Photoshop. |
| Is it legal to use free fonts for commercial projects? It depends on the specific font license. Always read the license terms. Fonts labeled “free for commercial use” are generally safe, but verify licensing before using in client work. |
| How do I know if a font is safe to use commercially? Check the font’s license documentation, download from reputable sources, and maintain records of font licenses. When in doubt, purchase fonts from established foundries or use Adobe Fonts. |
| Can I modify or edit fonts for my projects? Font modification rights vary by license. Most standard licenses don’t permit font file modification. For logo work requiring font modifications, ensure your license allows it or purchase an extended license. |
| How do I organize fonts for multiple projects? Use font management software to create project-based collections, utilize Adobe Fonts favorites, and maintain documentation of fonts used per project. Consider folder organization by project type or client. |
| What’s the best way to backup my font library? Maintain copies of all purchased/downloaded fonts in organized folders, document license information, and use cloud storage for accessibility. For Adobe Fonts, your activations are tied to your Adobe account. |
| How often should I clean up my font library? Review and clean your font library quarterly. Remove unused fonts, update outdated versions, and reorganize based on current project needs. This maintains optimal Photoshop performance. |
Final Words
Adding fonts to Photoshop has evolved far beyond simple file installation. With Adobe Fonts integration, mobile workflows, and advanced font management techniques, you now have multiple paths to enhance your typography toolkit. The key takeaways are:
- Adobe Fonts provides the most seamless experience for professional work
- Traditional installation remains valuable for custom and client fonts
- Proper font management prevents performance issues and workflow disruptions
- Understanding licensing protects you legally and professionally
Whether you’re a beginner designer or seasoned professional, these font installation methods will streamline your workflow and expand your creative possibilities. Remember to regularly update your font library, maintain proper licensing documentation, and keep Adobe Creative Cloud current for the best font experience.
Ready to take your Photoshop typography to the next level? Start with Adobe Fonts activation, organize your existing font library, and explore the advanced techniques covered in this guide. Your future design projects will benefit from the time invested in proper font management.
Logopoppin
Logopoppin is a graphic design agency that specializes in logo designing, web development, video production and advanced branding services. We love to innovate businesses with new age technologies, allowing them to improve their visual reputation.